

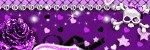
This Tutorial written by me. I did it with PSPX2 but it might work with other versions, too.
This tutorial is copyrighted to me, any resemblance is purely coincidental and not intentional!
You need this Supplies
PTU Scrap "Poison Ivy" by Scrazy Scrapz You can purchase it from Store Scraps and the City
Artwork by Rachel Anderson. You can purchase it from Store Creative Design Outlet.
Mask of your choice
Font Giddehand. Can you download on this page Font Zone
Let's begin!
*******************************************
1.
Open a 600x600px Image
Selections - Select all
Open a Paper of your choice - copy and paste into Selection
Selections - Select none
2.
Layers - Load/Save Mask - Load Mask from Disk - Mask of your choice
Layers - Merge - Merge Group
Add Drop Shadow
3.
Open element18 - resize your choice - copy and paste as new layer
Add Drop Shadow
4.
Open element46 - copy and paste as new Layer - resize if necessary
Add Drop Shadow
Move it under the element18 and to the right side
Add Drop Shadow
5.
Open element43 - copy and paste as new layer - resize if necessary
move it on the left side
Add Drop Shadow
Duplicate - Image - Mirror
6.
Open element44 - copy and paste as new layer - resize if necessary
Add Drop Shadow
Duplicate 3x and distribute it over the top element 18
7.
Open the Elements of your choice, resize and paste in your tag and add Drop Shadow
element5
element20
element21
element32
Add your watermark and the credits if necessary.
That's it!!!
I hope you had fun making this tag.
That's it!!!
I hope you had fun making this tag.


Keine Kommentare:
Kommentar veröffentlichen