Dieses Tutorial ist von mir geschrieben. Ich habe es mit PSPX3 erstellt, aber es kein Problem mit vorigen Versionen nach zu arbeiten.
Das Tutorial unterliegt meinen Copyright. Das verwendete Material unterliegt des Erstellers und Künstlers.
Du brauchst das Material
1 Tube deiner Wahl
Das Tutorial unterliegt meinen Copyright. Das verwendete Material unterliegt des Erstellers und Künstlers.
Du brauchst das Material
1 Tube deiner Wahl
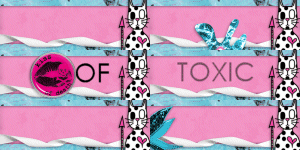
Thanks Hun...
:::::::::::::::::::::::::::::::::::::::::::::::::::::::::::::::::
1.
Öffne das Template 143 - mache eine Kopie vom Template - schliesse das Original Template - lösche die Copyinfo
2.
Wähle die Upper Left Rectangle - Auswahl - Auswahl alles - Auswahl - Frei - Auswahl - nicht frei
Öffne ein Papier deiner Wahl - kopiere und füge es als neue Ebene ein
Auswahl - Umkehren - ENTF-Taste drücken - Auswahl - Auswahl aufheben
Wähle Lower Right Rectangle - Auswahl - Auswahl alles - Auswahl - Frei - Auswahl - nicht frei
Öffne ein Papier deiner Wahl- kopiere und füge es als neue Ebene ein
Auswahl - Umkehren - ENTF-Taste drücken - Auswahl - Auswahl aufheben
3.
Wähle Upper Right Circle 1 - Auswahl - Auswahl alles - Auswahl - Frei - Auswahl - nicht frei
Öffne ein Papier deiner Wahl- kopiere und füge es als neue Ebene ein
Auswahl - Umkehren - ENTF-Taste drücken - Auswahl - Auswahl aufheben
Wähle Lower Left Circle 1 - Auswahl - Auswahl alles - Auswahl - Frei - Auswahl - nicht frei
Öffne ein Papier deiner Wahl- kopiere und füge es als neue Ebene ein
Auswahl - Umkehren - ENTF-Taste drücken - Auswahl - Auswahl aufheben
4.
Wähle Upper Right Circle 2 - Auswahl - Auswahl alles - Auswahl - Frei - Auswahl - nicht frei
Öffne deine Tube - kopiere und füge es als neue Ebene ein - Verschiebe sie über die ausgewählte Auswahl Upper Right Circle 2
Auswahl - Umkehren - ENTF-Taste drücken - Auswahl - Auswahl aufheben
Setze den Mischmodus auf Helligkeit (L) und die Deckfähigkeit auf 40%
Wähle Lower Left Circle 2 - Auswahl - Auswahl alles - Auswahl - Frei - Auswahl - nicht frei
Öffne deine Tube - Bild - horizontal spiegeln - kopiere und füge es als neue Ebene ein - Verschiebe sie über die ausgewählte Auswahl Lower Left Circle 2
Auswahl - Umkehren - ENTF-Taste drücken - Auswahl - Auswahl aufheben
Setze den Mischmodus auf Helligkeit (L) und die Deckfähigkeit auf 40%
5.
Wähle Pink Circle - Auswahl - Auswahl alles - Auswahl - Frei - Auswahl - nicht frei
Öffne ein Papier deiner Wahl - kopiere und füge es als neue Ebene ein
Auswahl - Umkehren - ENTF-Taste drücken - Auswahl - Auswahl aufheben
6.
Wähle Pink Circle - Auswahl - Auswahl alles - Auswahl - Frei - Auswahl - nicht frei
Öffne ein Papier deiner Wahl- kopiere und füge es als neue Ebene ein
Auswahl - Umkehren - ENTF-Taste drücken - Auswahl - Auswahl aufheben
7.
Wähle Thin Rectangle - Auswahl - Auswahl alles - Auswahl - Frei - Auswahl - nicht frei
Auswahl - Ändern - Vergrößern um 3 - Fülle es mit einer Farbe deiner Wahl
Auswahl - Auswahl aufheben
8.
Wähle Frame Back Left - Auswahl - Auswahl alles - Auswahl - Frei - Auswahl - nicht frei
12.Öffne deine Tube - kopiere und füge es als neue Ebene ein - Verschiebe sie über die ausgewählte Auswahl frame back left
Auswahl - Umkehren - ENTF-Taste drücken - Auswahl - Auswahl aufheben
Setze den Mischmodus auf Helligkeit(L)
Dupliziere die Tube - Bild - vertikal spiegeln - Verschiebe es über die Frame Back Right
9.
Wähle Lrg Stars - Auswahl - Auswahl alles - Auswahl - Frei - Auswahl - nicht frei - Fülle es mit einer Farbe deiner Wahl
Auswahl - Auswahl aufheben
10.
Öffne Kristin - Toxic Cupcake - Splat 2 - kopiere und füge es als neue Ebene ein - Verschiebe es unter Dotted Line 1 in die obere linken Ecke
Schlagschatten deiner Wahl
Dupliziere - Bild - vertikal spiegeln - Bild - horizontal spiegeln
11.
Öffne Kristin - Toxic Cupcake - Barbed Wire - Bild - Bildgröße um 50% verkleinern - kopiere und füge es als neue Ebene ein - Verschiebe es nach rechts unten auf das Rechtecks
Schlagschatten deiner Wahl
Dupliziere - Bild - vertikal spiegeln - Bild - horizontal spiegeln
Öffne Kristin - Toxic Cupcake - Skull Charm 2 - Bild - Bildgröße um 50% verkleinern - kopiere und füge es als neue Ebene ein - Verschiebe es so wie meines
Bild - Frei drehen - Links - 15,00
Schlagschatten deiner Wahl
13.
Wähle Frame Right
Öffne Kristin - Toxic Cupcake - Ribbon 2 - Bild - Bildgröße um 50% verkleinern - kopiere und füge es als neue Ebene ein
Bild - Frei drehen - Links - 30,00
Verschiebe es so wie meines
Schlagschatten deiner Wahl
14.
Öffne Kristin - Toxic Cupcake - Lips 2 - Bild - Bildgröße um 50% verkleinern - kopiere und füge es als neue Ebene ein
Verschiebe es nach rechts oben leicht auf dem Kreis
Schlagschatten deiner Wahl
15.
Wähle Lrg Stars
Öffne now your Tube - kopiere und füge es als neue Ebene ein - verkleinere falls nötig
Schlagschatten deiner Wahl
Dupliziere die Tube - Anpassen - Unschärfe - Graußscher Weichzeichner - Radius 1,00
Verschiebe es unter der anderen Tube
Wähle die Originaltube aus - Setze den Mischmodus auf Hartes Licht
Falls du möchtest schreib deinen Namen oder Text auf das Tag! Füge noch dein Wasserzeichen und Copyrightinfos! Fasse alle Ebenen zusammen und gegebenfalls verkleinern!
Ich hoffe du hattest Spass am Tutorial!
Ich hoffe du hattest Spass am Tutorial!